Some DIY IOT Projects (now with Apple Homekit)
Documentation on my IOT projects from May 2021.
Dial Control - Air Conditioner
My first personal embedded project.
Problem
The air conditioner at my new apartment was a bit older, and primarily operated with a single dial with 3 settings - off, medium, and high. I found it frustrating to turn it off when it had succeeded at cooling the room, only to turn it on a few minutes later when it heated up again. This wasn’t a problem with most air conditioners where you set a target temperature instead of an intensity.
Target
At a fundamental level, I wanted to generally keep my room cold while minimizing energy waste (e.g. while I’m out of the house). I also wanted to do this myself at a low cost.
I specifically I wanted to make my AC responsive both to:
- The environmental temperature. I wanted to make it have a target temperature, not just a velocity/intensity of cooling.
- My personal state. I wanted it to be active when I’m home, to a degree commensurate with how much I’d need cooling (e.g. while sleeping or working out, it should be more intense).
While minimizing:
- Cost of implementation
- Energy costs
Methods
Electronics
I used an Adafruit ESP32 feather, DC Lock Motor, and DC motor controller.
- The Adafruit ESP32 board is extremely reliable and can tie into their feather ecosystem. I love working with ESP32s as well due to the huge knowledgebase available online and ease of Wifi/Bluetooth connectivity.
- I had this DC lock motor lying around. It was designed for a door lock, so it only turns up to 90 degrees, but is very easily mounted. It was perfect for this application since the dial only rotated 90 degrees anyways.
- A DC motor controller is necessary to route the 5V power source directly to the motor rather than through the microcontroller pin, while still being able to control the motor using the digital pins. Honestly, I probably could’ve gotten away with using a pin as a 3.3V source, but a controller is best to minimize strain on the microcontroller
The electronics were pretty straightforward to assemble and get running. I hooked it all up on a breadboard, ran a simple DC test program to toggle the motor direction, and I was off to the races to make my own software.
You can take a closer look here. I simply used a Blink virtual pin to control turn the DC motor to a specific angle when a REST request is received. At the same time as polling Blynk, the device uses a DHT11 temperature sensor to poll whether the target temperature has been hit.
After finishing the device, I decided to add a button to force toggle the AC on/off, as well as a small digital display and up/down buttons to adjust the target temperature (rather than hardcoding it). This was really useful if I needed to turn it off before a Zoom meeting.
Mechanical Design
This was relatively new territory for me, as I had only had my 3D printer for a few weeks at the time. I’ll write about the pains of debugging the printer another time…
First, I had to make sure the motor could actually attach to the dial. This was a nice warmup exercise - I made a small adapter that fit into the motor and wrapped around the dial. Not too bad!
The mount was… trickier. I wanted something stable and simple. I also didn’t want to worry about generalization since the personal project scope was just that - personal. So, I used calipers to measure the socket on the AC which held the dials, modeled that in blender, and designed a panel that could securely slot into it without rotating.
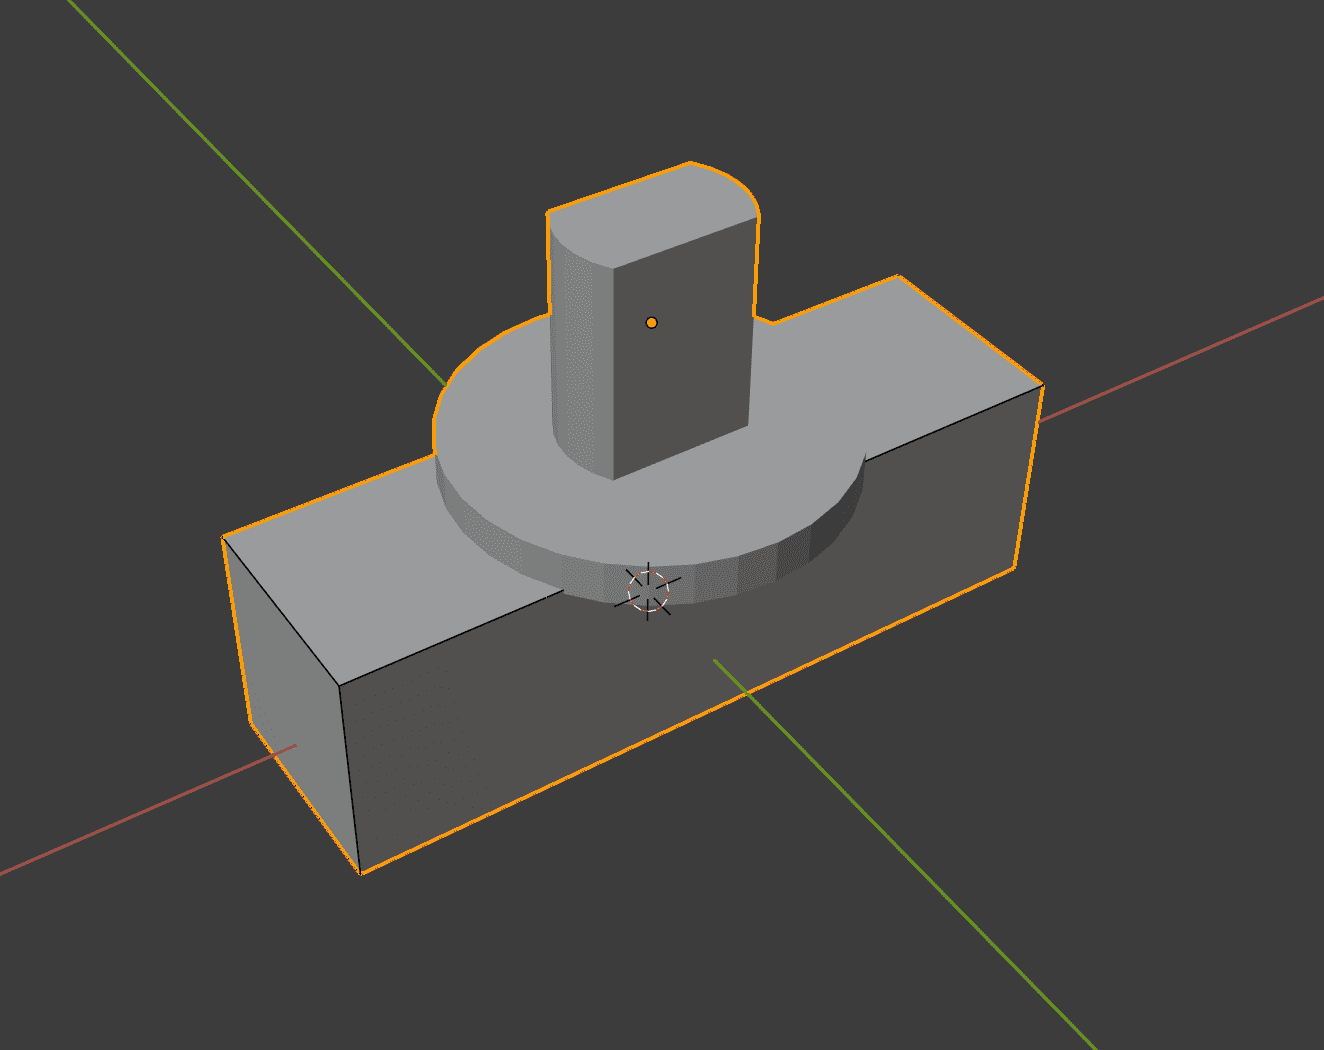
Now, I could position the motor in the same 3D scene in blender, and attach it to the panel. I could use screws, but modeling and printing that would add a lot of complexity and require me to (finally) buy a drill. I was stuck for a moment, but got lucky with a burst of insight - a flanged cylinder.
I got pretty lucky, and the motor mounted on the first try! However, the cylinders immediately snapped off. Easy fix - I widened the cylinder as a whole, and the cylinder base even more, to reinforce the mount.
I pushed the motor on the cylinders, and it easily snapped on! It wasn’t going anywhere.
Putting it together
I mounted the motor assembly to the AC and stuck the breadboard on with double stick tape, and to my unwarranted surprise, it worked! A Blynk API call would control the dial based on the integer input.
Of course, a REST request isn’t the ideal interface. I wrapped this into a Siri endpoint using the Apple Shortcuts app, put that endpoint in a Siri automation based on my location (to toggle the AC state when I leave/enter a radius of my apartment), and the project had hit minimum viable functionality. This was hugely satisfying.
I later set up NFC tags on my couch, bed, kitchen, and door to control my lighting and cooling devices as well.
Looking Back
I was really satisfied with the end product, especially since it was a big step to do an embedded project on my own from scratch (successfully, at that).
It managed responsiveness to environmental and personal state, was pretty darn cheap, and was privacy friendly as well. The geolocation processing was done locally on my phone, so it couldn’t be much more private. I firmly believe that IOT can be done in a privacy friendly way, a topic I plan on writing more about later. Energy costs are also significantly reduced due to the auto-shutoff of the AC when I leave.
Moving forward
There’s a few things I definitely want to get around to upgrading here:
- Migrate the electronics to a Protoboard/PCB and print a prettier housing for the buttons/display/electronics.
- Leverage the Deep Sleep functionality so the device doesn’t need a walled power connection.
- Use ESP-Homekit or ESPHome to take advantage of standard IOT ecosystems. But, I gotta say, this hacky Shortcuts method works wonders for me.
- Make the mount a bit more generalizable - it could be a nice fail-safe to turn off something like an oven when you leave the house.
Update 8/23
I actually got around to building this with Apple Homekit, so I could take advantage of their platform. I initially tried Espressif's official implementation, but it was honestly a bit overcomplicated. I found a library called HomeSpan that was incredibly intuitive and easy to port my code into. This is live on the homekit branch of my git repo.
Skills gained:
- 3D Design.
- Embedded Programming.
- IOT Software & Integration
Rail Control - Smart Curtains
After finishing my AC controller, I wanted to extend this to my simple bedroom curtains.
Problem
I wake up much more consistently to natural light than an alarm. So, smart curtains would be pretty nice.
Methods
The electronics were largely similar to the AC. I was able to reuse much of the code, since I simply needed a Blynk pin to turn a DC motor in some direction for a specified time. The mechanics, however, were much trickier.
Mechanical Design
I originally planned on using a pulley system to control both curtains at once, in opposite directions. This was not viable - the pulley needed to be strong enough to pull a decent amount of weight, and thus needed either
- A lot of friction on a long cable. 2. Toothed gears and a tread
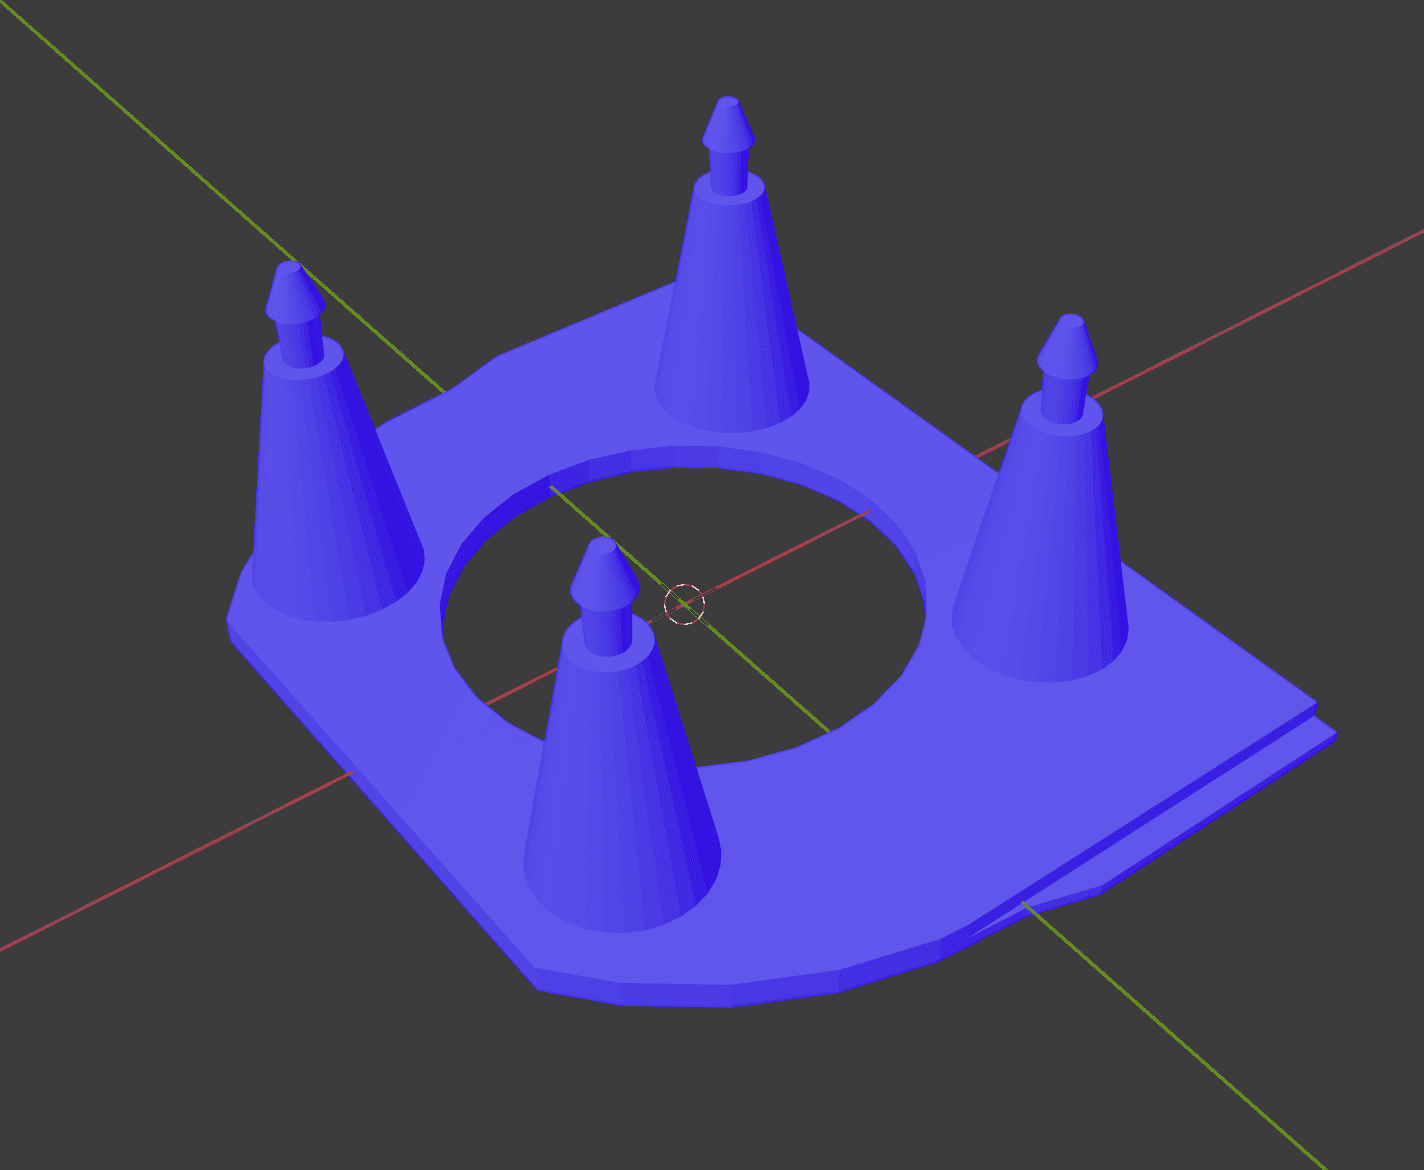
Both of which were not going to be easily solved. I came up with an alternate design that was a lot simpler - the electronics and motor would be attached directly to the rail, and move a carriage across the rail. By pinning the curtain to the housing, it’d pull the curtains with it. The model is shown below.

I made the surface of the wheel curved to fit exactly around the rail. I still needed the wheel to have a lot of friction with the rail. I shrunk the wheel a bit and superglued rubber strips on the surface, which did the trick (after a bit of trial and error tuning).
Looking back
It was pretty satisfying to see this device work, especially since it was more animated than the AC controller. Another successful step towards a DIY IOT setup!
Moving Forward
- Honestly, the housing could be fit a little better. I’ll probably do one more adjustment then reprint the housing and call it a day.
- Again, a protoboard/PCB would probably make for a more elegant device.
- I plan to adjust the code to allow for better graduated control - setting the curtain to different more points between open and closed.
Skills
This project was a huge step for my skills in mechanical design and problem solving, not to mention the extra practice with embedded design.